Taking proper care of your dryer goes beyond the simple task of cleaning out the lint trap, according to Morrison Plumbing. Regularly tending to your dryer vents is essential to guarantee safety, enhance energy efficiency, and extend the overall lifespan of your appliance. As you continue reading, we’re here to walk you through the step-by-step process of effectively cleaning your dryer vents. This guidance doesn’t just protect you from potential hazards; it’s a way to minimize the costs of energy consumption as well. By following these insights, you’re making a conscious effort to create a safer and more efficient environment while also being mindful of your energy expenses.
1.Safety First
Ensuring your safety is key when it comes to cleaning the dryer vent in your Madison County home. You will begin by taking the essential precaution of disconnecting your dryer from its power source. This step reduces electrical hazards, allowing safe maintenance. But safety goes beyond unplugging. Before cleaning, wear protective gloves to shield against debris and sharp edges. A mask adds another layer, guarding your respiratory health. This proactive measure significantly reduces the risk of accidents and ensures you can work on your appliance without any electrical hazards. Your safety is a priority; with these measures, you can tackle the task responsibly and effectively.
2. Gather the Proper Tools
Preparing to clean your dryer vents requires assembling the right set of tools for the task at hand. Ensuring a smooth process starts with having the appropriate equipment readily available. The first important tool to have is a screwdriver, serving as your initial instrument for the job. Following that, a vacuum cleaner equipped with a lengthy hose attachment becomes essential for thorough cleaning. To dive even deeper into the cleaning process, having a dryer vent brush or kit is vital. Lastly, don’t overlook the importance of having duct tape on hand. This seemingly simple item ensures a secure reconnection of components once the cleaning is complete. With these tools, you’re set for a successful dryer vent cleaning.

3. Unplug and Disconnect
The next step in moving forward in the process involves pulling your dryer away from the wall. With your appliance properly positioned, it’s time to proceed by disengaging the dryer from the vent hose. This is when your screwdriver comes in handy. You will use this tool to skillfully loosen and unfasten the clamp that securely holds the vent hose in its place. The deliberate use of the screwdriver ensures a controlled release of tension, allowing you to detach the hose without any strain. As the vent hose gently comes free from both the dryer and the wall vent, you’re able to move forward in your dryer vent cleaning process.
4. Clean the Vent
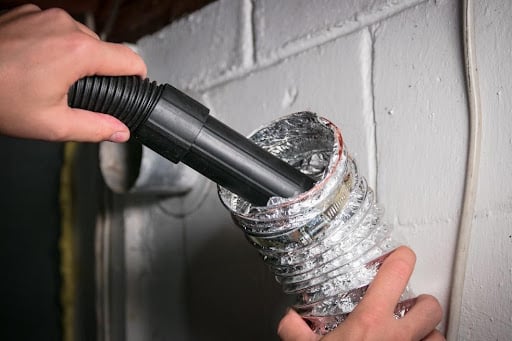
Proceeding with the process of cleaning the dryer vent involves initiating the cleaning phase. Begin by gently shaking out any lint or debris that has accumulated within the hose. The following stage presents the opportunity to utilize a vent brush or a cleaning kit to meticulously clean the dryer vent pipe. With the brush, carefully rotate it to dislodge any lint buildup that may be present. Once the vent pipe is thoroughly cleaned, use a vacuum cleaner equipped with a long hose attachment. This will allow you to effectively eliminate lint and debris from the area behind the dryers and the back of the dryer unit. Once you are done cleaning, you will reattach the vent hose to both the dryer and the wall vent, ensuring a secure connection. You will then use your duct tape to hold the hose in place.

5. Clean the Exterior Vent
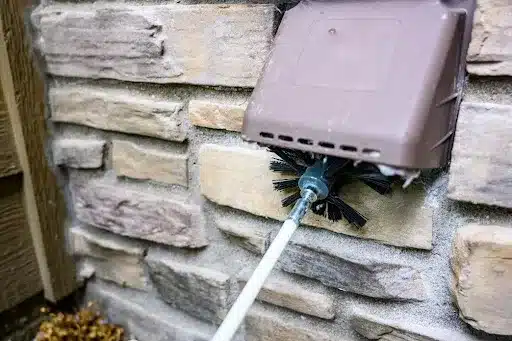
To proceed, step outside and identify the exit point of the vent from your home. Gently remove the vent cover, then use the vent brush to clean the external section of the vent thoroughly. It’s crucial to ensure that there are no obstructions that might obstruct the smooth airflow. With this stage completed, you can return to the inside of your home and plug the dryer back in. Next, you will turn on your dryer and monitor the effectiveness of the drying process for your clothes. If you observe notable improvements in drying times, you can confidently confirm the successful completion of your dryer vent cleaning endeavor.
6. Contact Morrison Plumbing
Incorporating these steps into your routine for dryer vent maintenance doesn’t just enhance your dryer’s efficiency but also contributes to your home’s safety. A cleaner and more efficient dryer not only conserves energy and saves money, but it also ensures proper clothes drying every time. Remember, a few simple actions can significantly impact your dryer’s performance and safety. At Morrison Plumbing, we understand the significance of maintenance services in maintaining the continual efficiency of the different systems in your Belleville, IL home. That’s why we offer maintenance services for heating, cooling, water heaters, and more. Contact us to learn more about the reliable maintenance services we have to offer.

